Editing videos is essential in today's digital age, whether you're a YouTuber, social media enthusiast, or simply someone who enjoys creating videos.
Kinemaster, a popular app, makes video editing accessible.
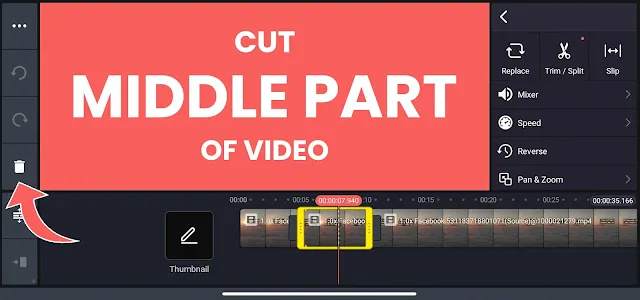
In this post, you'll learn how to cut the middle part of a video in Kinemaster.
Why Video Editing Is Important:
Effective editing keeps viewers engaged, delivers your message clearly, and enhances content enjoyment.
Kinemaster can transform raw footage into professional-looking videos.
How to Trim the Middle Part of a Video in Kinemaster
Step 1: Download & Install Kinemaster
- Download the latest version of Kinemaster from the Play Store.
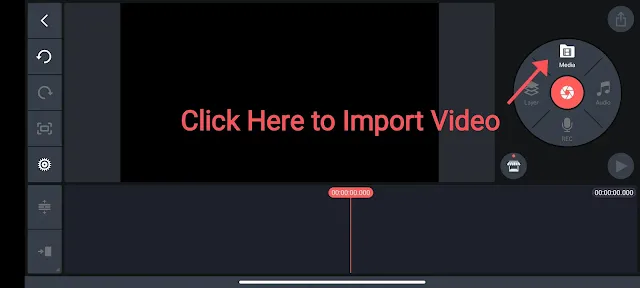
- Open the app, create a new project, and import your video.
Step 2: Import and Split Your Video
- Select your video in the media browser and drag it to the starting point from where you want to begin cutting.
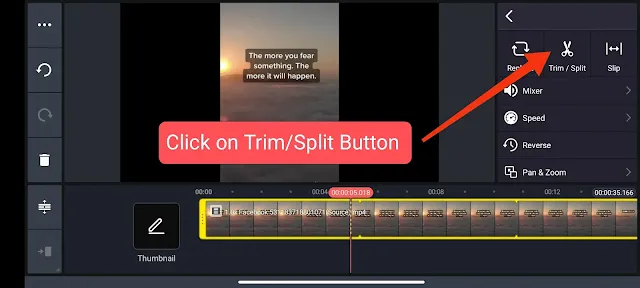
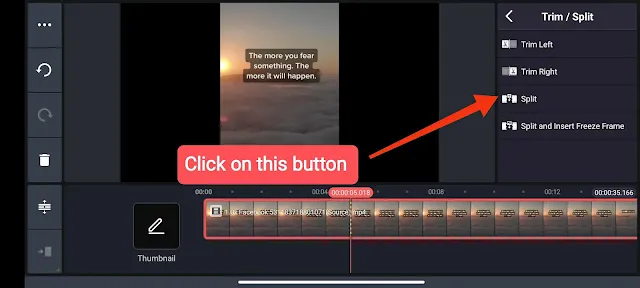
- Click on the trim/split icon, then select the third option to split your video.
- Repeat the process to add an ending cut where you want the unwanted part to end.
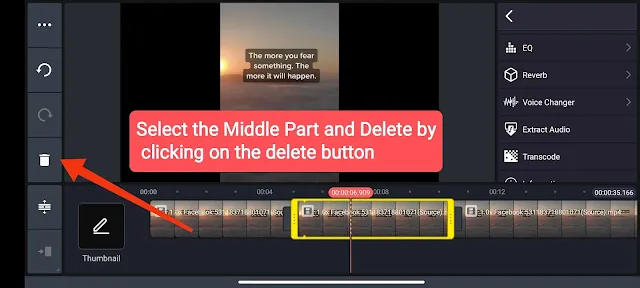
- Now your video is divided into three parts: beginning, middle, and end.
Step 3: Remove the Middle Part:
- Select the middle segment and delete it using the bin icon.
- Kinemaster simplifies this process, leaving you with the desired video part.
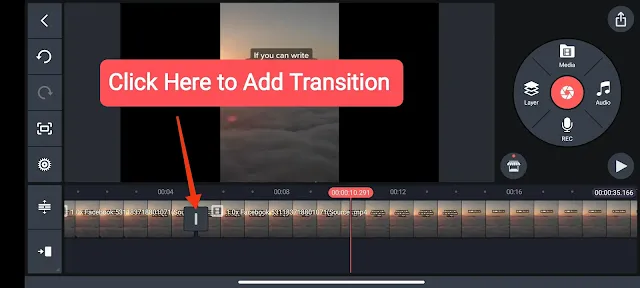
Step 4: Add Transitions (Optional):
- Enhance your video's professional look by adding transitions between the remaining segments.
- Kinemaster provides various transition effects.
Step 5: Preview and Export:
- Watch your video to ensure it looks good.
- Export your edited video in your preferred format and quality.
Also Read: How to Turn Off Pan and Zoom in Kinemaster
Conclusion:
By following this step-by-step tutorial, you can remove unwanted parts of the video in Kinemaster.
Practice is key, so keep experimenting and improving your skills.
Follow this guide and our video tutorial to edit your videos confidently. Happy editing!

